Showing posts with label birthday cake. Show all posts

Thursday, February 6, 2014

My birthday cake history


After I had my first daughter I found myself in a new world of children's birthday parties and having to adopt the role of a hostess for these kind of celebrations. At first this role was difficult and at times nerve wrecking but with every new birthday party it has become easier. I try to make every birthday party special and in some way different from the ones before. One way to do that is to make memorable birthday cakes.
My first cake was baked in a teddy bear tin with Betty Crocker chocolate cake mix. It did't turn out the way I had hoped. The cake was dry and partly burned. I had trouble getting it out of the tin so it broke (which I know now does not matter because you just glue it back together with the butter cream), so I got all upset and irritated. Needless to say most of the kids only just tasted the dry thing and one even complained of it having to much butter cream (I thought you could never have too much butter cream)! But it looked pretty cute.
After that fiasco I begun to make my own cakes from scratch and in stead of using formed tins I formed the cakes myself. I tried my hands on fondant but now I prefer to use only butter cream. Following is the cake history in chronological order. Keep in mind that these aren't the best of images because they were never intended to be published. :)

Betty Crocker bangsa kaka
Betty Crocker dry and burnt teddy bear.
Barbapabba og Barbavís sykurmassa kaka
Barbapapa and Barbalib fondant cake.
Brúsi úr Leikfangasögu 3 sykurmassa kaka
Lotso (from Toy Story 3) fondant cake.
Mía litla sykurmassa kaka
Little My (from the Moomins) fondant cake.
Prinsessu kaka
Princess with a butterfly in her hair (a special request from my daughter).
Smjörkrems súkkulaðikaka
Butter cream chocolate cake with candy.
Smjörkrems súkkulaðikaka
Butter cream chocolate cake with candy and home made chocolate sea animals.
Smjörkrems súkkulaðikaka
Butter cream chocolate cake with candy, origami crane and sparkles.

As you can see I have discarded the fondant and begun to work only with butter cream. And abandoned the cartoon figures for geometrical shapes and patterns. The main reason is that it takes longer and its more difficult to prepare the fondant cakes but also because I just lovE loVE LOVE to make PATTERNS and it's incredibly easy with butter cream.
The recipe for this cake, that is the latest (and the best) version, can be found in my earlier blog post.

Chao for now!


Saturday, February 1, 2014

The best birthday cake recipe

For the last four years I have been developing the perfect birthday cake. It has taken some time to reach this point and if I may say so myself it has come very close to perfection. The goal is of course to make a cake that both children and adults can enjoy despite their usual preferences (be it chocolate cakes, sponge cakes, no cakes, etc.). And now I share my recipe with you so you can enjoy making and serving this awesome cake.

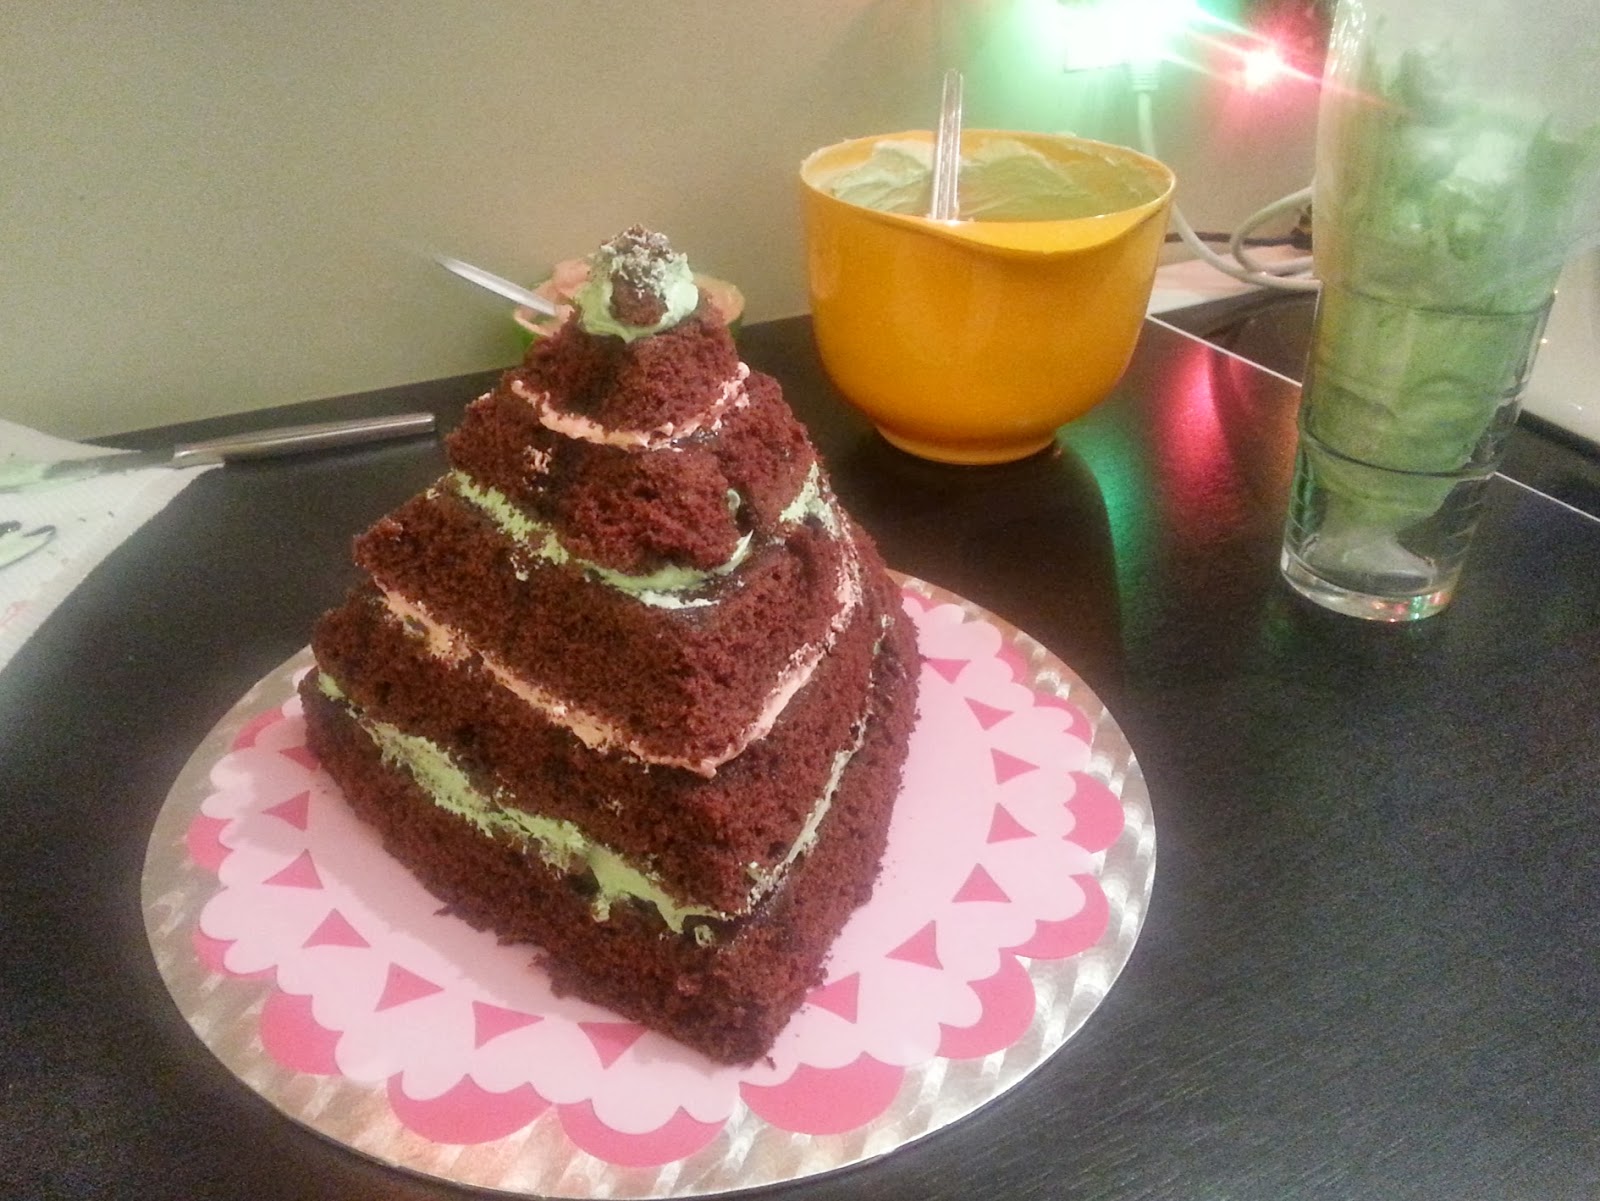
Pyramid cake assembled and ready to
be covered with butter cream
Chocolate cake (Devil's cake)

150 g    granulated sugar
150 g    brown sugar
125 g    soft unsalted butter
2           eggs
260 g    flour
1 tsp     baking soda
1 tsp     baking powder
1/2 tsp  salt
40 g      cocoa powder (sifted)
2 dl       milk


Method

  1. Preheat the oven to 180°
  2. Line the bottoms of two 24 cm round sandwich tins with baking parchment and butter the sides
  3. Beat well together in a freestanding mixer the sugar, brown sugar and butter
  4. Add the eggs one at a time and beat well together.
  5. Mix flour, baking soda, baking powder, salt and cocoa powder together in a bowl. Make sure to sift the cocoa powder.
  6. Add the dry ingredients and the milk to the sugar and butter mixture. Best is to do this in three or four steps, adding a bit of dry ingredients and then a bit of milk and the dry ingredients again and so on until the batter becomes smooth and glossy. It can be good to stop the mixer now and then and loosen the batter from the sides of the bowl with a spatula to make sure every bit of ingredient blends well into the batter.
  7. Divide the batter into the two tins and put in the oven for 19-22 minutes, or until a cake tester comes out clean. You can also listen to the cake, if you hear a whizzing or bubbly sound then the cake needs bit more time in the oven.
  8. Take the tins out and let them stand for a few minutes before turning the cakes out to cool.

Note.
When I make a birthday cake like the triangular pyramid I usually make one and a half recipe because I cut a lot of the cake away when forming it. The cut off can, for example, be used to make cake pins or be assembled into a small leftover cake which can then be decorated with the leftover butter cream.
For the bigger recipe I either use more sandwich tins or one big oven tin (the one that comes with most ovens)
I always bake the cake two nights before the party and assemble it and decorate the day before. This way I buy me some time and I can enjoy decorating it in no rush. 


Simple syrup

250 ml   water
250 ml   granulated sugar


Method

  1. Combine water and sugar in a saucepan. Bring the water to a boil and stir until all the sugar has dissolved. Allow the syrup to cool.

Note.
I drizzle the simple syrup over each layer of the cake so it becomes more succulent, otherwise the cake tends to become a bit dry.
Instead of the simple syrup you can also use the syrup from canned peaches or different types of berry juices.


Butter cream
225 gr   granulated sugar
80 ml.   water
6           lightly beaten egg yolks
1,5 tsp  vanilla essence
320 gr   soft unsalted butter
6 tsp     icing/confectionery sugar


Method

  1. Combine water and sugar in a saucepan and bring to a boil. When boiling lower the heat to a medium and let it boil until all the sugar has dissolved. 
  2. In the meanwhile lightly beat the egg yolks.
  3. Stir a little bit of the hot sugar liquid into the beaten egg yolks. Then pour the egg yolks into the saucepan with the rest of the sugar liquid while stirring constantly. Let the mixture boil for about two minutes, or until it begins to thicken. Make sure to stir the whole time to prevent the egg yolks form getting lumpy.
  4. Take the mixture of the heat and stir in the vanilla essence. Leave the mixture to cool to a room temperature.
  5. Beat the soft butter in a freestanding mixer for five minutes, or until it has a lighter color and becomes soft and smooth.
  6. Gradually stir in the egg yolk mixture at a medium speed.
  7. Sift the icing/confectionery sugar and add to the mixture. Beat for about five more minutes.
  8. The butter cream is ready and you can add the coloring you wish to use.

Note.
If the egg yolk mixture gets lumpy you can strain it before adding it to the butter. 
If you stir the egg yolk mixture too early (too hot) into the egg yolk mixture and the butter cream becomes almost soupy you can save it by keep on beating the mixture.
This butter cream recipe is the same as given on the Allt í köku website in Icelandic.
This butter cream is essentially what is called french butter cream. For another method (with images and all) on how to make this butter cream you can follow this link.


afmæliskaka með smjörkremi
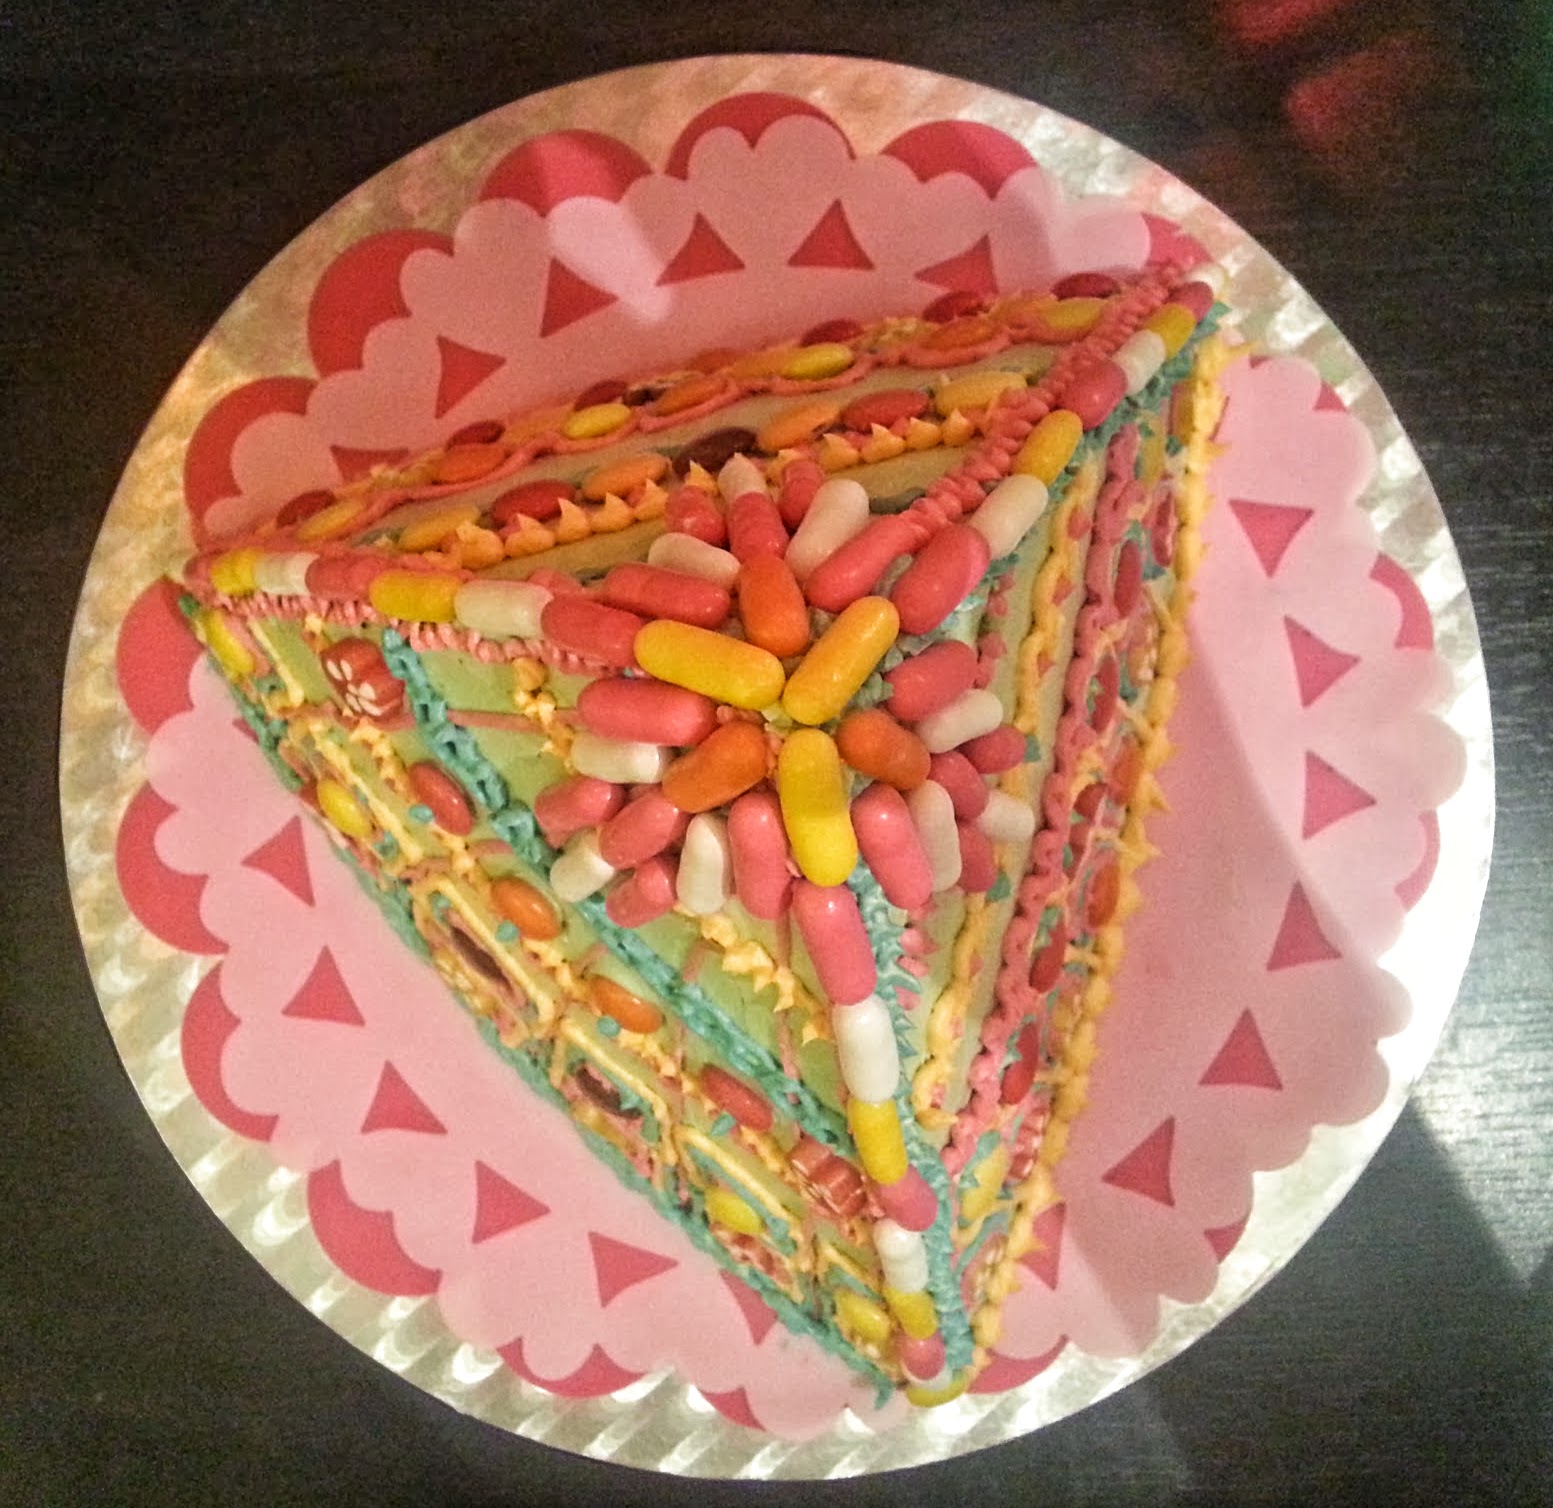
The final outcome
Assembly

Chocolate cake
Simple syrup
Apricot jam
Butter cream

Method
  1. Cut the chocolate cake into its intended form.
  2. Drizzle some of the simple syrup over the bottom layer.
  3. Spread the bottom layer with apricot jam.
  4. Spread butter cream on the bottom of the next layer and join the two layers. 
  5. Repeat 2 - 4 for as many layers as you have on your cake.
  6. When the cake has been assembled cover the cake with a thin layer of butter cream. It is good to use a flat steel spatula to get an even surface. 
  7. Decorate the cake at will with the rest of the butter cream and candy.

Enjoy!

Monday, January 27, 2014

Birthday party

Last week my brother asked me to help him out for his daughter's tenth birthday party. At first I wasn't so sure that I had the time or energy to do it but then my brain just wouldn't stop organizing and designing the party. So I just went all inn.
The birthday girl wanted the party to be a costume party as usual but with a Monsters High theme. I have made enough figurative birthday cakes through the years and I didn't want to go into that for this party. I decided to try and follow the Monsters High color-scheme as well as I could with what ever colors I had in my drawer and just have a go with a triangular pyramid (which I had for some reason visioned in my head along with some wage idea of patterns from Peruvian carpets). And this is the result.


afmæliskaka


afmæliskaka

I wasn't sure if ten-year old girls were still keen on birthday cakes so I added some more fun to it. I folded a glittery crane to put on the top and  lighted sparklers on each side.

afmæliskaka með stjörnuljósum og origami bird

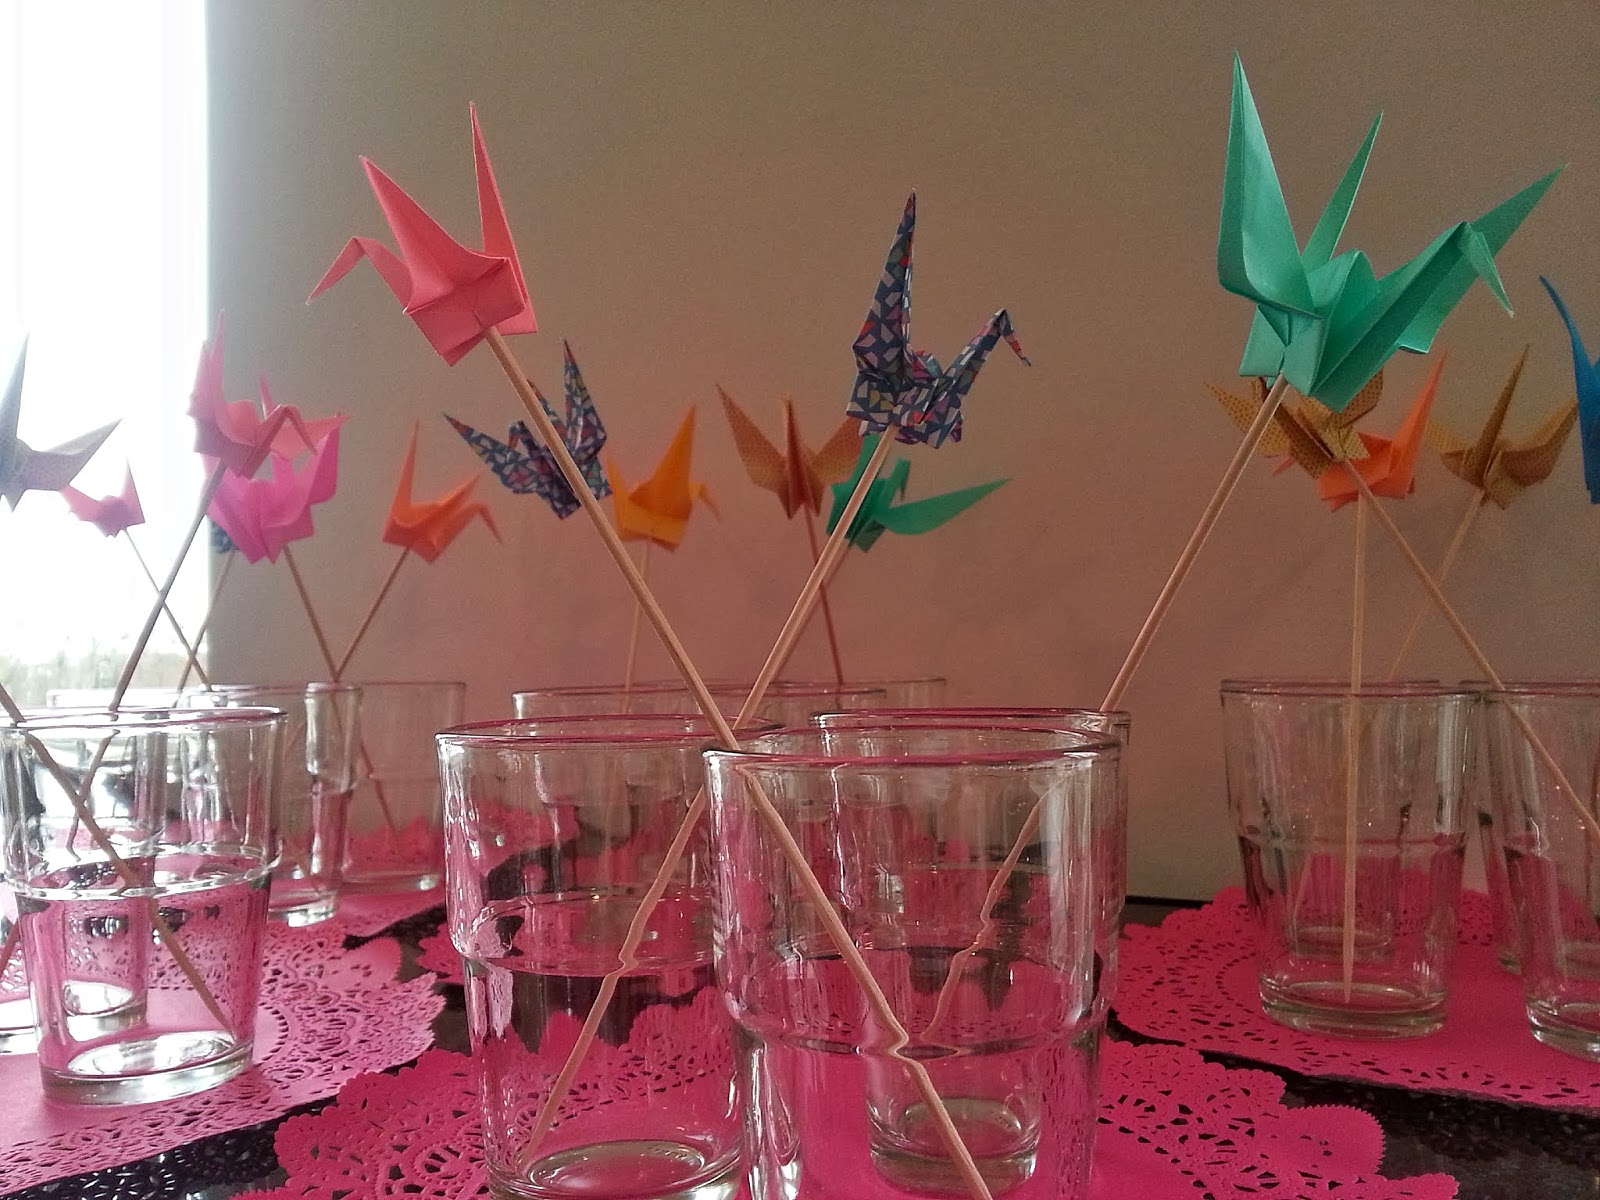
During the week prior to the party I made a lot of cranes to put on cocktail sticks. They were of many sizes and different types of paper. The paper size I used varied from 7.5x7.5 cm squares up to 13x13 cm. The folding is both quick and easy and when its ready the folds create a center point at the bottom of the crane that can be opened slightly up to insert the cocktail pin. Follow this LINK for a tutorial on folding the crane.
I used both regular origami paper and patterned crafting paper. The patterned paper I bought in Tiger as well as the cocktail sticks. The sticks I bought actually came with a plastic glitter fringe decoration on the end which I took off in order to put the birds on. Plain sticks (with no decoration) can surely be bought somewhere but since I didn't know where their sold I jumped on the once in Tiger. 
Making the sticks takes some time  (if you are doing many) but they are inexpensive and their decorative effect makes up for the hours spent making them.

kokteil pinnar með origami fugli

kokteil pinnar með origami fugli


As a last decorative thing I made a string of patterned flags and as this was to be a Monsters High party I glued the Monsters High skull on each flag.
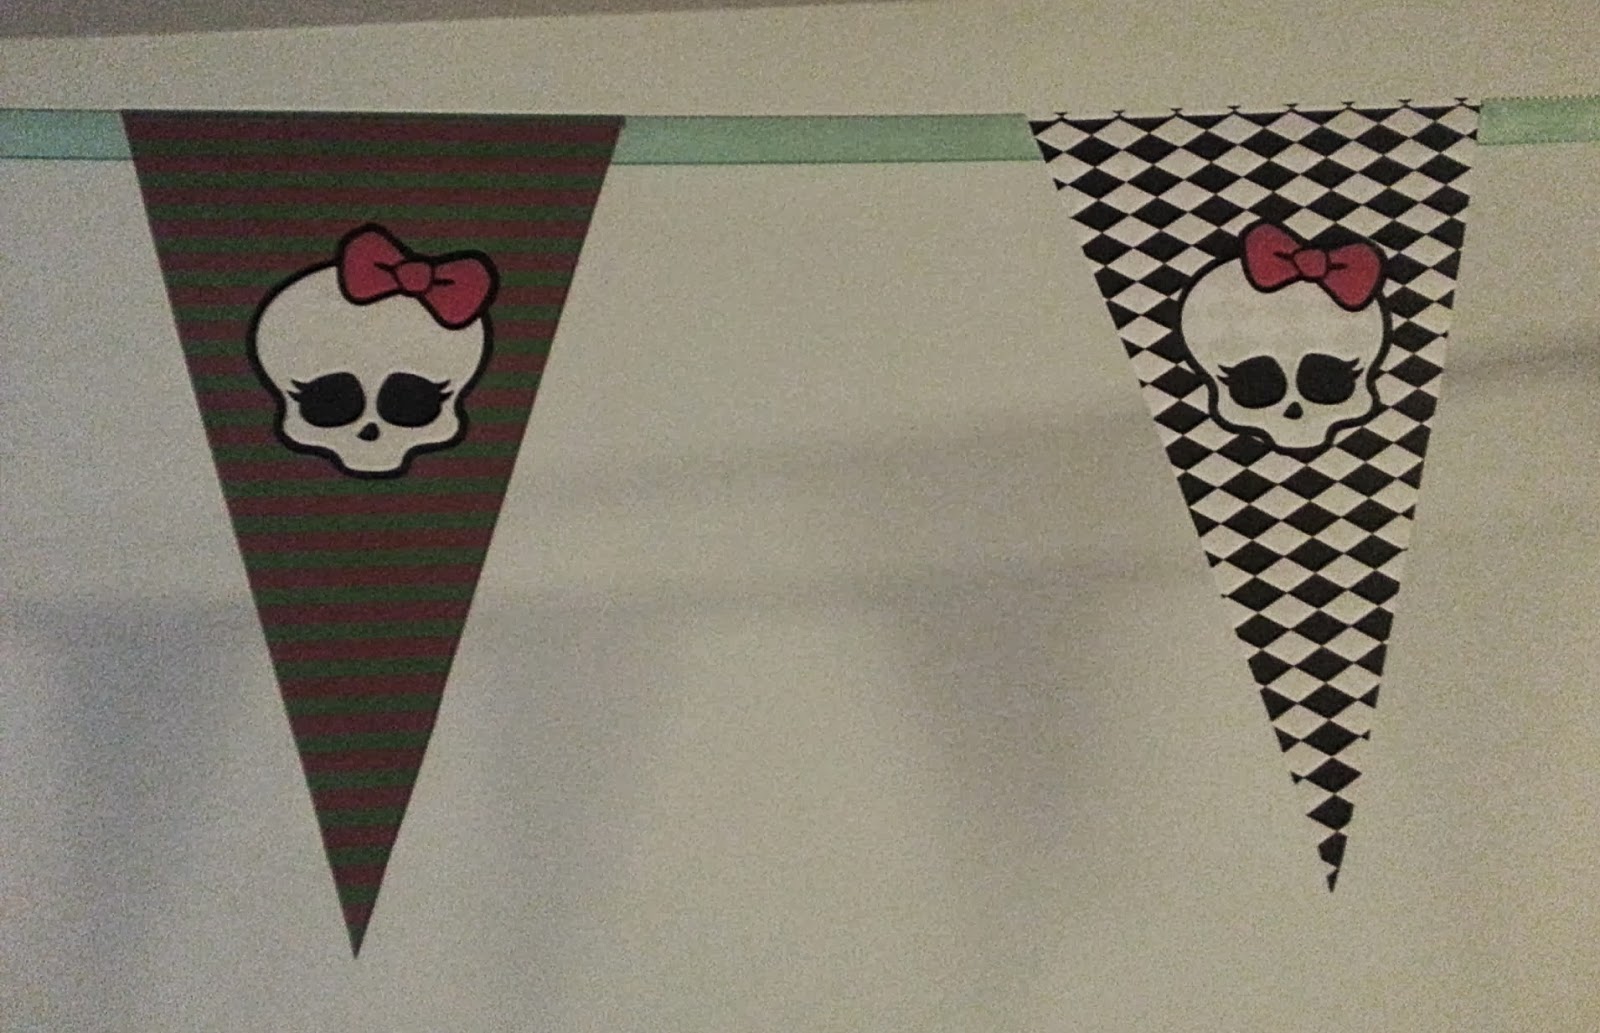

Monsters High veislufánar

Monsters High veislu fánar

For each flag I folded a A4 sheet of paper in half and cut out a triangle that was 12 cm wide at the top and 21 cm long (the width of a A4 sheet). This gave me two triangles. I folded the top of one of the triangles down one centimeter but on the other one I cut one centimeter of the top. Now both triangles measured 20 cm long and about 11 cm wide. Next I glued a one centimeter wide ribbon under the fold on the triangle with the folded top and then glued the other triangle on the first one. Then I had a flag with print on both sides. This process I repeated for the rest of the flags placing them 10 cm apart on the ribbon. Lastly I found the Monsters High scull logo with a white background and printed out as many as I needed, cut them out and glued on both sides of each flag. And volá! Yes it did take a lot of time but I am happy with the final result so it was worth it.
The paper I used I got very cheap in Tiger. It's about the same weight as a regular photocopy paper but when glued together it becomes quite heavy which then results in nice stiff flags.

Lastly just a few words on the catering. The table was set with the birthday cake (a chocolate cake with butter cream), pizzas and a fruit punch (see picture above). Then towards the end of the party we prepared a chocolate fondue with marshmallows, strawberries, wafer biscuits and mango bits to dip in.  So the cocktail sticks, in stead of just being for decoration, came to good use both for the fruit punch as well as the fondue.

In case you were wondering the decorations and the catering were a hit with both the birthday girl and her guest. That is so rewarding!
Over and out for now.